Dry pet food is made through a continuous manufacturing process that grinds raw ingredients, mixes them into a uniform dough, cooks the mixture under high heat and pressure inside an extruder, dries it to a shelf-stable moisture level, and coats it with fats and flavors before packaging. Approximately 95% of all dry kibble worldwide is produced this way, yet most explanations online either oversimplify the science or push a sales agenda.
If you are launching a pet food brand, managing a production floor, or buying extrusion equipment for the first time, you need the real numbers. You need to know why a 5-degree temperature shift inside the barrel can ruin a batch. You need to know why vitamins cannot survive extrusion, and why cooling must happen before coating. This guide walks through the pet food manufacturing process step by step, with the operating parameters, quality checkpoints, and troubleshooting insights that plant engineers actually use.
We have designed and commissioned extrusion systems for snack food, pasta, protein bars, and pet food for over a decade. The principles in this article come from that hands-on experience.
Key Takeaways
- The pet food manufacturing process uses extrusion at 110–180°C and 3–15 MPa pressure to cook, sterilize, and shape kibble in one continuous operation.
- Pre-conditioning at 70–90°C raises moisture to 20–30% and boosts extruder throughput by 10–15% while starting starch gelatinization early.
- Drying reduces moisture from 20–30% down to 8–12%; cooling must bring kibble near room temperature before coating to prevent fat oxidation.
- Heat-sensitive nutrients, including vitamins A, D, E, and probiotics, are applied after extrusion via spray or vacuum coating to preserve potency.
- Common failures like extruder surging, uneven expansion, and coating inconsistency usually trace back to particle size, moisture control, or temperature calibration.
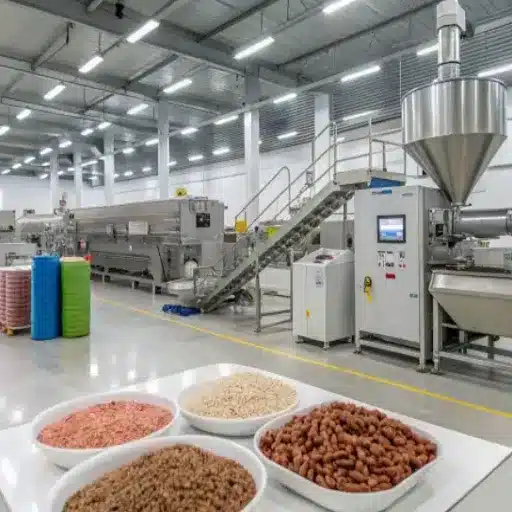
Pet Food Manufacturing Process: What Is It?
The pet food manufacturing process is a continuous sequence of grinding, mixing, preconditioning, extrusion, drying, cooling, coating, and packaging. It transforms raw ingredients such as meat meal, grains, fats, vitamins, and minerals into shelf-stable, nutritionally complete dry pet food.
Dry kibble dominates the market, representing roughly 63–65% of total global pet food volume according to industry data. Wet canned food and semi-moist treats use different equipment and thermal processes, but extrusion remains the core technology for dry formats. If you are evaluating food processing machinery for a new facility, understanding this sequence is the first step toward specifying the right equipment.
Step 1: Ingredient Reception and Pre-Processing
Every batch begins with raw material verification. Receiving teams test incoming protein meals, grain fractions, fats, and micro-ingredients for moisture, protein content, and microbial load. Salmonella screening happens here, because contaminated raw materials will survive straight through to the finished bag if they enter the line unchecked.
Once cleared, ingredients move to the grinding stage. A hammer mill or roller mill reduces particles to 250–600 microns, or 60–100 mesh. Uniform particle size matters more than most newcomers realize. When particles vary wildly, the extruder barrel sees inconsistent flow rates, which leads to surging and temperature swings.
Fine, consistent grinding also ensures nutrients distribute evenly through the mix.
Step 2: Mixing, Formulation, and Pre-Conditioning
After grinding, an automated batching system weighs each ingredient to match the formula target. Most formulations follow AAFCO or FEDIAF nutritional guidelines, depending on the target market. The weighed ingredients drop into a ribbon or twin-shaft paddle mixer and blend for 90–180 seconds. The goal is a coefficient of variation at or below 5%, meaning any sample taken from the mix contains nearly identical nutrient levels.
Pre-conditioning is the step that separates efficient lines from struggling ones. Steam and water inject into the dry mix inside a preconditioner, raising the temperature to 70–90°C and moisture to 20–30%. This begins starch gelatinization before the material ever reaches the extruder barrel, which increases extruder throughput by 10–15% and improves final digestibility. Skipping preconditioning forces the extruder to do all the thermal work itself, which limits capacity and can shorten screw life.
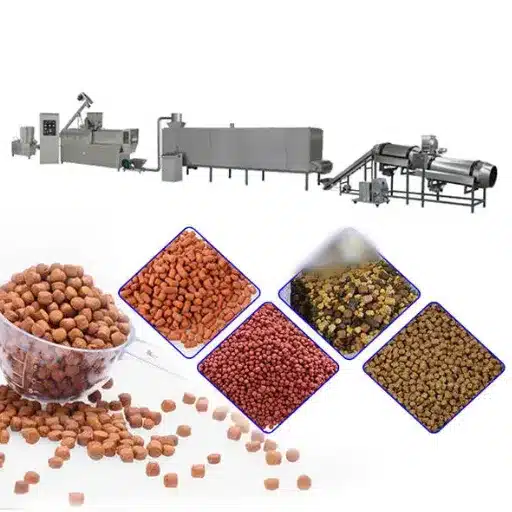
Step 3: Extrusion, The Heart of the Pet Food Manufacturing Process
Extrusion is where grinding and mixing become cooking and shaping. The pre-conditioned mash enters the extruder barrel, where one or more rotating screws push it forward under extreme mechanical shear. Inside the barrel, three energy sources work together: friction from the screws, conductive heat from the barrel jackets, and residual steam enthalpy from preconditioning.
Operating parameters vary by recipe, but typical ranges are:
- Barrel pressure: 3–15 MPa
- Barrel temperature: 110–180°C
- Screw speed: 200–500 rpm
- Residence time: 30–90 seconds
What Happens Inside the Barrel
Three critical transformations occur during the pet food extrusion process. First, starch gelatinization. Raw starch granules resist digestion in pets, with a digestibility around 50%. Under extrusion heat and moisture, those granules rupture and re-align into a gel matrix, boosting digestibility above 90%.
Second, protein denaturation. High heat unravels protein structures, which improves amino acid availability and reduces allergenic potential for some ingredients. Third, pathogen destruction. The combination of temperature, pressure, and shear acts as the official “kill step” in HACCP plans, achieving greater than 99% reduction of Salmonella and other harmful organisms.
At the end of the barrel, the cooked dough forces through a die plate with shaped openings. As the dough exits from high pressure into atmospheric pressure, moisture flashes instantly to steam. The kibble puffs outward, creating the light, porous texture that pets recognize. A rotary knife at the die face cuts the extruded rope into uniform pieces.
Wet Extrusion vs. Dry Extrusion
| Parameter | Dry Extrusion | Wet Extrusion |
|---|---|---|
| Steam preconditioner | Not required | Required |
| Primary heat source | Mechanical friction + barrel heating | Steam + mechanical shear |
| Initial capital cost | Lower | Higher |
| Product expansion | Moderate | Superior |
| Recipe flexibility | Limited | High, handles 20–40% fresh meat |
| Best suited for | Small batches, R&D, simple formulas | Commercial production, premium recipes |
Wet extrusion is the industry standard for commercial pet food manufacturing because it delivers better control, higher capacity, and more consistent product quality. Dry extrusion works for pilot lines or regions where steam infrastructure is unavailable.
Single-Screw vs. Twin-Screw Systems
Single-screw extruders use one rotating screw inside the barrel. They are cost-effective and energy-efficient, but they struggle with high-meat recipes and complex formulations because mixing happens only through passive shear along one screw channel.
Twin-screw extruders use two intermeshing screws that actively knead the material between them. This design distributes heat more evenly, handles sticky or high-fat recipes without slippage, and allows processors to run formulations with 20–40% fresh meat content. Our twin-screw extrusion systems draw on engineering principles proven across snack food, pasta, and protein bar production.
When you understand how extrusion actually works, you know what questions to ask before buying equipment. If you are evaluating a pet food production line, start by confirming whether the extruder can handle your target recipe at full capacity, not just on paper.
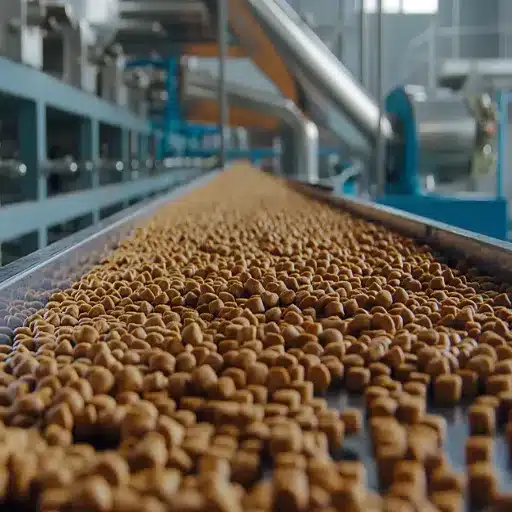
Step 4: Drying and Cooling
Freshly extruded kibble carries 20–30% moisture. That is far too high for shelf stability. Mold and bacterial growth accelerate above 14% moisture, so the drying stage must drive moisture down to 8–12%.
Kibble enters a multi-pass belt dryer where heated air at 80–130°C circulates across the product bed for 15–25 minutes. Uniform airflow is non-negotiable. Wet spots in the bed create pockets of under-dried product that can spoil in the bag. Over-drying wastes energy and produces brittle kibble that crumbles during handling.
After drying, a counter-flow cooler pulls ambient air through the kibble until it reaches near-room temperature. Cooling is not just a comfort step. Hot kibble entering the coater will melt surface fats prematurely, cause uneven coating distribution, and trigger oxidation that leads to rancidity. Kibble should enter coating below 30°C.
Step 5: Coating and Flavoring
Here is a fact that surprises many newcomers: the extruder destroys certain nutrients. Vitamins A, D, and E degrade at extrusion temperatures. Probiotics and enzymes cannot survive the barrel. That is why coating happens after extrusion, not before.
Fat and Oil Application
Fats and oils supply concentrated energy and improve palatability. A typical dry kibble recipe receives 8–12% fat by weight through post-extrusion spraying. Basic systems use a rotating drum with spray nozzles.
Advanced systems use vacuum coating, which pulls fat deep into the porous kibble structure rather than leaving it on the surface. Vacuum-coated kibble shows less surface grease, better fat stability, and reduced bag staining.
Palatants and Digests
Palatants are flavor enhancers that encourage pets to eat. Common examples include hydrolyzed liver, yeast extracts, and fish hydrolysates. These are sprayed onto cooled kibble alongside fats. The application rate and droplet size determine how evenly the flavor distributes across every piece.
Protecting Nutrient Stability
After coating, antioxidants such as tocopherols, BHA, or BHT help prevent fat oxidation during storage. Properly dried, cooled, and nitrogen-flushed kibble can achieve 12–18 months of shelf life at ambient temperature. Without these controls, oxidation shortens shelf life and creates off-flavors that pets reject.
Step 6: Screening, Packaging, and Final Quality Control
Before packaging, a vibratory sieve removes fines and broken pieces. These rejects often recycle back into the mixer at a controlled ratio. Metal detectors and X-ray systems catch any foreign contaminants that may have entered during grinding or extrusion.
Packaging lines use multi-head weighers to portion exact weights into bags, pouches, or bulk sacks. Nitrogen flushing displaces oxygen inside the package, which slows oxidation and preserves freshness. Every bag receives a lot code and expiration date for full traceability.
Final quality control verifies moisture, protein, fat, and ash against the guaranteed analysis printed on the label. Microbiological testing confirms Salmonella and Enterobacteriaceae clearance before the batch releases for shipment. These checkpoints turn the pet food manufacturing process from a production sequence into a verified food safety system.
Process Problems and Their Solutions
Problems occur even in good process designs. Identifying the source of the problem eliminates much guesswork.
Extruder surging or blockage. Inconsistent particle size, over-feeding, or incorrect preconditioner moisture causes the screw to lose grip on the material. The fix starts at the grinder. Check mesh size, then verify that preconditioner steam pressure and water flow rates match the recipe target.
Uneven kibble expansion. Die wear, barrel temperature imbalance, or a shift in starch-to-protein ratio changes how much the kibble puffs at the die face. Inspect die apertures for enlargement, verify zone temperatures with calibrated probes, and confirm the formulation has not drifted.
Coating inconsistency. If kibble enters the coater too warm, or if spray nozzles clog, fat distribution becomes patchy. Always confirm cooler outlet temperature before coating, and maintain a nozzle-cleaning schedule calibrated to your coating rate.
High moisture after drying. Uneven airflow, overloaded dryer beds, or incorrect temperature setpoints leave moisture pockets. Reduce bed depth, balance fan dampers across dryer zones, and validate temperature sensors quarterly.
Marcus, a plant manager we worked with in Vietnam, spent three weeks fighting extruder surges that always started on Tuesday mornings. After walking through the process together, he checked his preconditioner steam valve calibration and found a 15% flow variance tied to the facility’s weekly maintenance cycle. A ten-minute valve adjustment solved a problem that had cost him three metric tons of off-spec product.
How Understanding the Process Helps You Choose Better Equipment
Every step in this process translates directly into equipment specifications. Preconditioner steam capacity determines throughput. Extruder screw configuration determines recipe flexibility.
Dryer airflow uniformity determines shelf stability. Coater vacuum depth determines fat retention and product appearance.
When you understand the pet food manufacturing process at this level, supplier claims become testable questions. You stop asking “What is your price?” and start asking “What is your preconditioner steam consumption per ton at 25% moisture?” You know why a twin-screw extruder matters for high-meat recipes. You know why dryer bed depth affects every bag you ship.
This process knowledge also connects across product categories. The die-forming principles in our pasta extrusion systems apply directly to kibble shaping. The protein-handling expertise in our protein bar production line translates to high-meat pet food formulations. Extrusion is extrusion. The physics do not change, even when the recipe does.
If you are ready to move from process knowledge to equipment selection, review the full equipment and capacity breakdown in our companion guide to pet food production line design.
Conclusion
The pet food manufacturing process balances thermodynamics, nutrition science, and food safety to produce consistent, shelf-stable kibble. Raw ingredients become finished product through grinding, mixing, preconditioning, extrusion, drying, cooling, coating, and packaging. Each stage depends on the one before it, and each offers clear quality checkpoints that prevent costly recalls.
Three principles will serve you well. First, extrusion is both cooking and shaping. The parameters inside the barrel determine digestibility, safety, and texture simultaneously. Second, post-extrusion coating preserves heat-sensitive nutrients that the barrel would destroy. Third, quality control at every stage, from incoming inspection to final microbiological clearance, protects both pets and your brand.
When you understand how the process works, you are equipped to ask better questions, diagnose problems faster, and specify equipment that matches your real production goals. If you need a CE-certified extrusion system designed around your recipe and capacity targets, contact our engineering team for a customized proposal.