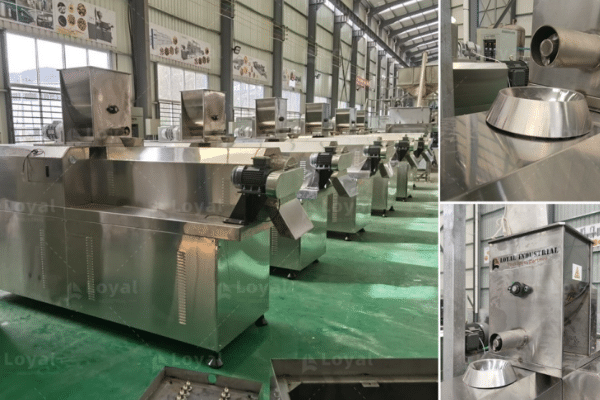
The food extrusion process forces conditioned raw ingredients through a shaped die under high temperature, pressure, and mechanical shear, cooking and forming them into snacks, cereals, and pasta in one continuous pass that takes under a minute. Known as high-temperature short-time (HTST) processing, it’s the most versatile single operation in modern snack and cereal manufacturing.
When Rafael first launched his corn snack brand in Guadalajara, he assumed extrusion was simple: push dough through a hole, cut it, done. His first test batch came out dense, cracked, and nothing like the light puffs he wanted to sell. The problem was never the machine. It was the process. Temperature, moisture, and screw speed had to work together, stage by stage, or the product failed.
If you’re evaluating an extrusion line, you likely understand the machine better than you think. The gap for most buyers is the sequence of what happens inside it. This guide walks you through the food extrusion process step by step, from raw material to packaged product, and shows you which machine and which setting matter at every stage. By the end, you’ll know the eight stages, the parameters you control, and how the process changes for corn puffs, pellets, pasta, and protein bars.
Key Takeaways
- Food extrusion is a high-temperature short-time (HTST) process that mixes, cooks, and shapes ingredients in a single pass of under a minute.
- The eight stages run from raw material preparation and preconditioning through cooking, die forming, expansion, cutting, and drying.
- Three parameters drive most outcomes: barrel temperature (roughly 50 to 280 degrees Celsius), moisture (15 to 40 percent), and screw speed (under 500 to over 1,000 rpm).
- Direct-expanded snacks, pellets, pasta, and protein bars each use a different process profile, so one line cannot run them all without adjustment.
- Consistent quality comes from holding those parameters steady, which is why a CE-certified turnkey line matters more than the extruder alone.
What Is the Food Extrusion Process?

Food extrusion is a continuous, high-temperature short-time process in which conditioned ingredients are mixed, cooked, and forced through a shaped die under pressure, producing expanded or shaped foods in a single pass. It replaces several separate steps, mixing, cooking, and forming, with one operation.
That’s what makes extrusion so efficient. Instead of batch mixing followed by long baking or boiling, a single extruder converts raw flour into a finished shape in seconds. Because the product reaches a low water activity of about 0.1 to 0.4, extruded foods are naturally shelf-stable without preservatives.
If you want the broader picture of what extrusion is and the types of systems available, start with our guide to food extrusion technology. Here, we focus on the process itself.
Understanding the process is the first step. Seeing it run on a complete line is the next. Explore our turnkey food production lines to see how these stages come together in a real system.
The 8 Steps of the Food Extrusion Process
Every food extrusion process follows the same sequence. Here are the eight stages, from raw material to finished product:
- Raw material preparation – ingredients are ground, blended, and formulated to a consistent particle size.
- Feeding – a metering feeder delivers a steady stream of material into the barrel.
- Preconditioning – steam and water hydrate the mix to 15 to 40 percent moisture.
- Conveying, mixing, and shearing – the screw moves and works the material through the barrel.
- Cooking – heat, pressure, and shear gelatinize starch and denature protein.
- Die forming – the molten mass is forced through the die at 150 to 800 psi.
- Expansion and cutting – pressure release puffs the product and a cutter sizes it to length.
- Drying and cooling – the product is dried to final moisture and cooled for packaging.
Steps 1 to 3: Raw Material Prep, Feeding, and Preconditioning
Preparing the Formulation
The process begins before anything enters the barrel. Ingredients such as corn meal, rice flour, potato flour, or blended protein are ground and mixed to a uniform particle size. Uneven particle size is one of the most common causes of inconsistent expansion, because large particles cook at a different rate than fine ones.
Formulation matters just as much. Starch content, fat level, and fiber all change how the material behaves under shear. A high-fiber formula needs more moisture and gentler shear than a simple corn mix.
Feeding Into the Barrel
The prepared mix moves into a feed hopper and then into the extruder through a metering feeder. Feed rate has to stay constant. If feed surges, the barrel overfills and pressure spikes. If feed drops, the product comes out under-cooked and misshapen.
This is why a consistent feeder is a control point, not an afterthought. Operators who chase quality problems usually find the issue started at the feed end.
Preconditioning With Steam and Water
Preconditioning hydrates and warms the material before it enters the barrel. Steam and water bring the mix to 15 to 40 percent moisture and begin to soften the starch. This step isn’t cosmetic.
Proper preconditioning shortens residence time in the barrel, reduces wear on the screw, and cuts energy use. It also lets the starch begin gelatinizing before full heat is applied, which produces a more even cook and a more uniform expansion later. Skipping or under-running this step is a common reason for hard, pale extrudate.
Steps 4 to 5: Conveying, Mixing, Shearing, and Cooking in the Barrel
The Barrel Zones
Inside the barrel, the screw does four jobs at once: it conveys the material forward, mixes it, compresses it, and shears it against the barrel wall. Most barrels are divided into zones, each with its own temperature setting.
A typical profile rises from roughly 50 to 90 degrees Celsius in the first zone to 90 to 150 degrees Celsius in the final zone. The material itself can reach 120 to 280 degrees Celsius under high-speed operation, driven by both barrel heat and the friction of the screw.
The HTST Principle
This is where cooking actually happens, and it happens fast. The combination of heat, pressure, and mechanical shear gelatinizes starch and denatures protein in seconds. Starch granules swell and burst, and proteins unfold and realign, transforming the raw mix into a plasticized melt.
The chemistry behind this transformation is its own topic. Our guide to extrusion cooking explains starch gelatinization and protein denaturation in depth. For the process itself, the key point is simpler: everything downstream depends on reaching the right cook in the barrel.
Steps 6 to 7: Die Forming, Expansion, and Cutting
Forcing the Melt Through the Die
The plasticized melt reaches the die at the end of the barrel. The die restricts flow, which builds back-pressure. Die pressure typically runs 150 to 800 psi, and the final zones of some systems reach 1,000 to 3,000 psi. Smaller orifices create more pressure, which changes the texture of the finished product.
The die gives the product its shape. From simple round puffs to complex 2D and 3D pellets, the geometry of the die, along with the pressure behind it, determines the final form. Die design is a specialized discipline we cover separately in our guide to extrusion die design.
Expansion and Puffing
The most visible step happens at the die exit. When the pressurized melt leaves the die, pressure drops instantly. Superheated water inside the material flashes to steam, and the product puffs up. Expansion ratios typically run from 2:1 to 11:1, which is what turns a small, dense melt into a light, airy snack.
Moisture, temperature, and die pressure all control how much the product expands. More moisture generally means more steam and more puff, up to the point where the structure collapses under its own weight.
Cutting to Length
A rotating die-face cutter sizes the extrudate as it exits. Cutters run with two to 32 blades at 1,000 to 4,000 rpm. Blade speed sets product length, and it must be matched to the flow rate or the pieces come out ragged or uneven.
Step 8: Drying, Cooling, and Finishing

Drying to Final Moisture
Freshly extruded product is still too wet. Direct-expanded snacks leave the extruder at high moisture and are dried at 135 to 185 degrees Celsius down to a final 2.5 to 5 percent moisture. This sets the crisp texture and locks in shelf stability.
Pellet products follow a different route. They are extruded and dried to an intermediate 10 to 12 percent moisture, then stored. Later, they are expanded in a second step using hot air around 250 degrees Celsius or oil around 180 degrees Celsius.
Optional Frying, Seasoning, and Coating
Some products move next to a fryer, a seasoning drum, or a coating unit. Oil and seasoning are applied after drying so they adhere without making the product soggy. This stage is where flavor and finish come together.
Cooling and Packaging Handoff
Finally, the product is cooled and transferred to packaging. Cooling prevents condensation inside the package, which would soften the product. The handoff from cooling to packaging should be smooth, because a finished snack that sits too long reabsorbs moisture from the air.
Food Extrusion Process Parameters
Every stage of the food extrusion process is controlled by a handful of variables. Operators who master these can hold quality steady and fix most problems without changing the machine.
| Parameter | Typical Range | What It Controls |
|---|---|---|
| Barrel temperature | 50 to 150°C by zone; mass up to 120 to 280°C | Degree of cook, starch gelatinization, color |
| Moisture content | 15 to 40% | Expansion, texture, energy input |
| Screw speed | Under 500 rpm conventional; over 700 rpm high-speed | Shear, mixing, residence time |
| Specific mechanical energy (SME) | 20 to 240 Wh/kg | Degree of cook, final texture |
| Die pressure | 150 to 800 psi; up to 1,000 to 3,000 psig | Expansion, shape definition |
| Residence time | Seconds (HTST) | Cook level, color, nutrient retention |
Temperature sets how thoroughly the starch cooks. Moisture drives expansion, because water is what flashes to steam at the die. Screw speed sets shear and how long the material stays in the barrel, which in turn affects color and texture. Specific mechanical energy, or SME, is the total mechanical work put into the product and is the most reliable single indicator of cook level.
Consider a snack line in Lagos that kept turning out pale, hard corn puffs. The operator raised the temperature, which only scorched the surface. The real issue was moisture: the preconditioner was running nearly dry, so the starch never fully gelatinized before the die.
When the team restored preconditioning to about 18 percent moisture, the same recipe puffed to full size, with no change to the extruder itself. The process, not the machine, was the fix.
Moisture is a deep subject on its own. For the full comparison of low-moisture and high-moisture extrusion, see our guide to dry extrusion vs wet extrusion.
How the Food Extrusion Process Changes by Product

One of the biggest misconceptions about extrusion is that it’s a single process. In practice, the profile changes sharply by product. Here is how the same stages differ for four common categories.
Direct-Expanded Snacks
Corn puffs, onion rings, and similar snacks use high temperature and low moisture. The product expands at the die in one step and is then dried to final moisture. This is the classic, and simplest, extrusion profile, and it powers products like our corn puff snacks production line.
2D and 3D Pellet Snacks
Pellets are a two-step process. The product is extruded and dried to an intermediate moisture, then expanded later with hot air or oil. This lets manufacturers ship stable half-products and finish them at the point of sale or in a second plant. Our 2D/3D snacks pellet process line is built around this two-stage approach.
Pasta and Macaroni
Pasta uses cold extrusion. The dough runs below about 45 degrees Celsius with low shear, so there is no expansion. The goal is a dense, uniform shape that holds its form through drying and cooking. A dedicated pasta and macaroni production line is configured differently from a snack line for exactly this reason.
Protein Bars and Texturized Protein
Protein products run at higher moisture so that protein denaturation, rather than starch expansion, does the structuring. This produces the chewy, dense texture of a protein bar.
Priya’s startup learned this the hard way: her first bars came out crumbly and dry because the line ran like a cereal puff. Raising moisture and lowering screw speed let the protein bind into the chewy texture her customers wanted, on the same machine. Our protein bar production line is tuned for this higher-moisture profile.
Mapping your product to the right process profile is where a manufacturer adds real value. Tell us what you’re making, and we’ll specify the line and the process to match. Explore our snack food machinery to see the range of systems available.
Frequently Asked Questions
How does food extrusion work?
Food extrusion forces conditioned ingredients through a rotating screw inside a heated barrel, then through a shaped die. Heat, pressure, and shear cook the material in seconds, and the sudden pressure drop at the die puffs and shapes the finished product.
What are the steps of the food extrusion process?
The eight steps are raw material preparation, feeding, preconditioning, conveying and mixing, cooking, die forming, expansion and cutting, and drying and cooling.
What temperature and pressure are used in food extrusion?
Barrel zones typically run 50 to 150 degrees Celsius, with the material reaching 120 to 280 degrees Celsius under high-speed operation. Die pressure runs 150 to 800 psi, and final zones can reach 1,000 to 3,000 psi.
Why do extruded snacks puff up?
Extruded snacks puff because superheated water inside the melt flashes to steam the instant pressure drops at the die exit. That rapid expansion creates the light, airy texture.
What is the difference between hot and cold extrusion?
Hot extrusion uses heat and shear to cook the product, producing expanded snacks. Cold extrusion keeps temperatures low, typically below 45 degrees Celsius, to form dense, unexpanded products like pasta.
How long does the food extrusion process take?
Cooking happens in seconds under HTST conditions, and a complete pass from feeder to cut product takes under a minute. Drying and finishing add time after extrusion.
Conclusion
The food extrusion process is efficient, but it isn’t forgiving. Every stage, from raw material preparation through preconditioning, cooking, die forming, expansion, and drying, depends on the one before it. Get moisture or screw speed wrong, and the best extruder in the world won’t save the product.
The good news is that the process is fully controllable. Barrel temperature, moisture, screw speed, and die pressure are all dials you can set and hold. When you understand what each one does, you can fix most quality problems without changing the machine, and you can match the process profile to the product you actually make.
That’s exactly what we do at Shandong Loyal Industrial. With over 10 years of experience and clients in more than 50 countries, we design CE-certified turnkey extrusion lines around your recipe, your output target, and your budget, and we stay with you from consultation through startup.
Ready to map the process to your product? Contact us for a quote and tell us what you’re making. We’ll specify the line and the process to match.