The pet food extrusion process is a high-temperature, short-time cooking method that transforms raw ingredients into finished dry kibble by applying heat, pressure, and mechanical shear inside an extruder barrel. Manufacturers rely on this process to gelatinize starches, destroy pathogens, and form uniform kibble shapes that are shelf-stable and highly digestible for pets.
Yet achieving consistent results is not automatic. When Marcus Chen took over as production manager at a mid-sized pet food facility in Jiangsu province, he inherited a line that produced kibble with uneven expansion, excessive fines, and unpredictable moisture levels. His team had tweaked the extruder settings for months without a systematic approach. Within six weeks of mapping out the full pet food extrusion process and calibrating each stage against specific parameters, Marcus reduced product waste by 22 percent and achieved a moisture variance of under 0.5 percent batch to batch. His story is not unique. Many manufacturers leave quality and efficiency on the table simply because they lack a complete picture of how extrusion works and which levers to pull.
This guide delivers that complete picture. You will learn every stage of the pet food extrusion process with precise temperature, pressure, and moisture parameters you can apply immediately. We will compare wet and dry extrusion systems, break down single-screw versus twin-screw configurations, and walk through practical troubleshooting for the most common pet food extrusion process problems. Whether you are optimizing an existing line or evaluating equipment for a new facility, the information here will help you produce consistent, high-quality kibble at scale.
Key Takeaways
- The pet food extrusion process runs through seven distinct stages, from grinding and preconditioning to drying, coating, and packaging, with each stage requiring precise control over temperature, moisture, and timing.
- Wet extrusion using a preconditioner delivers superior expansion and recipe flexibility compared to dry extrusion, but requires higher capital investment and operational expertise.
- Twin-screw extruders handle high-meat formulations up to 40 percent fresh meat content, while single-screw systems remain cost-effective for standard grain-based recipes.
- Barrel temperatures between 110 and 180 degrees Celsius, pressures of 3 to 15 MPa, and screw speeds of 200 to 500 rpm represent the standard operating window for commercial pet food extrusion.
- Most extrusion problems, including surging, poor expansion, and excessive fines, trace back to inconsistencies in grinding, preconditioning, or die configuration.
What Is Pet Food Extrusion?
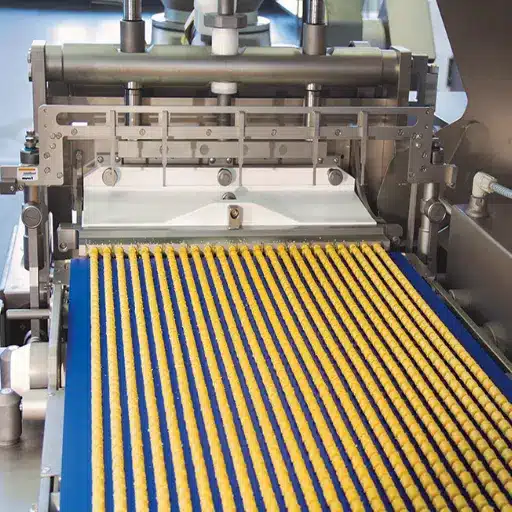
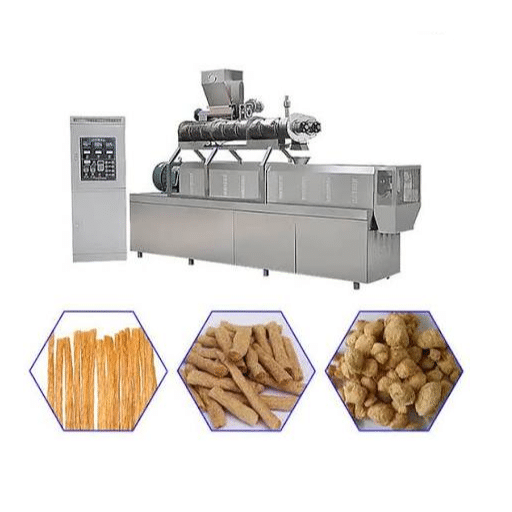
Pet food extrusion is a continuous thermo-mechanical cooking process that converts a mixture of milled grains, protein meals, fats, vitamins, and minerals into expanded, shaped kibble. The process occurs inside a heated barrel where one or more rotating screws convey, compress, and cook the ingredient mix before forcing it through a shaped die plate. When the cooked dough exits the die, the sudden drop from high pressure to atmospheric pressure causes moisture within the dough to flash into steam, expanding the product into its characteristic light, porous structure.
The global pet food extrusion market reached approximately 96 billion dollars in 2026, driven by rising pet ownership and demand for premium, nutritionally optimized dry diets, according to industry market research from The Business Research Company. Extrusion dominates dry pet food manufacturing because it accomplishes multiple objectives in a single, continuous operation. Starch gelatinization breaks down raw starches from corn, rice, peas, or potatoes so pets can digest them efficiently, typically raising starch digestibility above 90 percent. Research published in PMC’s veterinary sciences journal confirms that extrusion parameters significantly influence starch digestibility in canine diets. Simultaneously, the high temperatures involved destroy harmful pathogens like Salmonella, achieving greater than 99 percent bacterial reduction. The process also integrates fats and oils into the product matrix, controls final texture and density, and shapes the product into consistent kibble sizes that appeal to both pets and pet owners.
Understanding these fundamentals matters because every decision in the pet food extrusion process, from raw material particle size to die open area, affects the final product quality. Manufacturers who treat extrusion as a black box rather than a precisely controllable process risk inconsistent output, higher waste, and missed opportunities to innovate with new recipes.
Want to see how extrusion fits into a complete production workflow? Read our step-by-step pet food manufacturing process guide to understand how extrusion connects to grinding, drying, and packaging stages.
The 7 Stages of the Pet Food Extrusion Process
A complete pet food extrusion process flows through seven integrated stages. Each stage builds on the previous one, and weakness at any point will cascade into quality problems downstream.
Stage 1: Grinding and Mixing
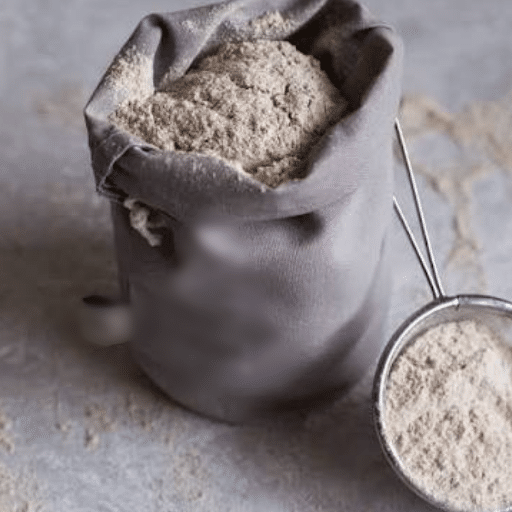
Raw materials arrive in various forms. Grains and starches come as flours or meals. Protein sources include meat meals, fish meals, soy concentrates, and fresh meat. Fats, vitamins, minerals, and palatants complete the formulation. Before extrusion, all dry ingredients must be ground to a uniform particle size, typically 60 to 100 mesh, or 250 to 600 microns.
Particle size uniformity directly affects extrusion stability. Large particles create weak spots in the extruded dough, leading to uneven expansion and breakage. Fine particles below the optimal range can cause excessive friction and overheating inside the barrel. After grinding, an automated batching system weighs ingredients according to the formulation recipe, and a ribbon or twin-shaft paddle mixer blends them for 90 to 180 seconds. A well-mixed batch achieves a coefficient of variation below 5 percent, meaning every portion of the mix contains the same proportional composition.
Magnets and metal detectors at this stage remove foreign objects that could damage the extruder screws or contaminate the final product.
Stage 2: Preconditioning
The dry mix enters a preconditioner, a chamber with rotating paddles where steam and water are injected. Preconditioning raises the mixture temperature to 70 to 90 degrees Celsius and increases moisture content to 15 to 35 percent, depending on the recipe and extruder type. Residence time in the preconditioner typically lasts 2 to 4 minutes.
This stage performs critical preparatory work. Steam injection begins starch hydration and protein softening before the mix ever reaches the extruder barrel. Properly preconditioned material reduces mechanical wear on the extruder screws, lowers the energy required inside the barrel, and increases overall throughput by 10 to 15 percent compared to non-preconditioned feeds. For manufacturers running high-capacity lines, that throughput boost translates directly into higher output without additional capital investment.
Water injection supplements steam to reach target moisture levels, especially for recipes requiring higher hydration. The precise balance of steam and water depends on the initial ingredient moisture, ambient conditions, and target extrusion parameters.
Stage 3: Extrusion Cooking
The preconditioned dough feeds into the extruder barrel, where rotating screws convey it forward while compressing and shearing the material. As the screw channel narrows toward the discharge end, pressure builds to 3 to 15 MPa and barrel temperatures reach 110 to 180 degrees Celsius. Screw speed typically ranges from 200 to 500 rpm, and total residence time inside the barrel lasts 30 to 90 seconds.
Inside this high-pressure, high-temperature environment, three critical transformations occur. First, starches gelatinize as heat and moisture disrupt crystalline structures, converting raw starches into forms that animal digestive enzymes can break down efficiently. Second, proteins denature and cook, improving digestibility and binding the dough matrix. Third, the extreme heat destroys pathogens and spoilage organisms, rendering the product microbiologically safe.
Specific mechanical energy, a measure of the energy input per unit mass from screw rotation, typically ranges from 100 to 250 kilowatt-hours per ton for pet food applications. Monitoring SME helps operators maintain consistent cook levels across batches.
Stage 4: Expansion and Shaping at the Die
At the barrel discharge, the cooked dough is forced through a die plate, a hardened metal plate containing shaped orifices that determine the final kibble profile. The die generates back-pressure necessary for cooking and controls product shape, whether standard rounds, rings, bones, or custom shapes for brand differentiation.
When the dough exits the die, it moves instantly from high pressure to normal atmospheric pressure. This pressure drop causes water in the dough to flash-vaporize, expanding the product into a light, porous structure. A rotating face cutter at the die exit slices the extruded stream into pellets of the desired length. Knife speed relative to extrusion rate determines kibble size.
Manufacturers must account for die swell, the natural expansion of dough after it exits the die. A 4-millimeter die hole may produce a 6-millimeter kibble after expansion. Understanding die swell for your specific recipe is essential for achieving target product dimensions.
Stage 5: Drying
Freshly extruded kibble exits the die at 80 to 100 degrees Celsius with a moisture content of 20 to 30 percent, far too high for shelf stability. Multi-stage belt dryers reduce moisture to 8 to 12 percent using controlled hot air at 80 to 130 degrees Celsius over 15 to 25 minutes.
Modern dryers feature three or more temperature zones. The first zone uses higher temperatures to remove surface moisture rapidly. Subsequent zones apply gentler heat to draw moisture from the center of the kibble without case-hardening the exterior, which would trap internal moisture and lead to spoilage. Air-recycling systems improve energy efficiency by reusing heated air.
Final moisture below 10 percent, with water activity below 0.60 to 0.65, prevents microbial growth and ensures a shelf life of 12 to 18 months under proper storage conditions.
Stage 6: Coating and Flavoring
After drying and cooling, kibble enters a rotating coating drum where fats, oils, digests, and flavor enhancers are applied. Fat application typically ranges from 8 to 12 percent by weight, though some premium recipes target higher levels for improved palatability and energy density.
Atmospheric coating systems spray heated fat onto tumbling kibble. Vacuum coating systems offer superior penetration by drawing liquids deep into the porous kibble structure, allowing up to 40 percent liquid addition and better absorption than surface spraying alone. Vacuum coating is particularly valuable for high-fat recipes or when applying heat-sensitive nutrients like vitamins A, D, and E, and probiotics that would degrade during the high-temperature extrusion stage.
Palatants, including meat digests and yeast extracts, are often applied alongside fats to enhance aroma and taste appeal. The coating stage directly influences pet acceptance, making it a critical quality parameter alongside nutritional composition.
Stage 7: Cooling, Screening, and Packaging
Coated kibble must cool below 30 degrees Celsius before packaging to prevent condensation inside bags, which causes mold growth and product degradation. Counter-flow coolers use ambient air moving opposite to product flow, efficiently reducing temperature while stabilizing the porous structure.
Vibratory screens remove fines and broken pieces, which are typically recycled back into the raw material stream to minimize waste. Metal detectors and X-ray inspection systems provide final safety verification. Finished product passes through multi-head weighers and vertical form-fill-seal baggers, with optional nitrogen flushing to displace oxygen and extend shelf life.
Lot coding ensures traceability, and final laboratory testing confirms moisture, protein, fat, ash, and microbiological compliance before release.
Explore how each piece of equipment fits together in a complete system. Our pet food manufacturing equipment buyer’s guide breaks down extruders, dryers, coaters, and packaging lines with selection criteria for every capacity tier.
Wet Extrusion vs. Dry Extrusion: Which Is Right for Your Operation?
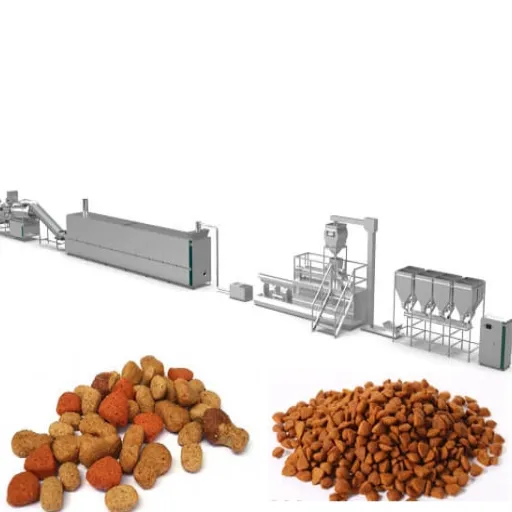
Manufacturers face a fundamental choice in the pet food extrusion process between wet and dry extrusion systems. The decision affects capital cost, operating complexity, recipe flexibility, and final product quality.
| Parameter | Wet Extrusion | Dry Extrusion |
|---|---|---|
| Preconditioner | Required, with steam injection | Not required |
| Primary heat source | Steam plus mechanical shear | Mechanical friction plus barrel heating |
| Moisture control | Precise, with steam and water injection | Limited to ingredient moisture |
| Recipe flexibility | High, handles 20 to 40 percent fresh meat | Limited, best for grain-based formulations |
| Expansion quality | Superior, uniform puffing | Moderate, less consistent |
| Capital cost | Higher | Lower |
| Operating complexity | Higher, requires steam boiler | Lower, simpler startup |
| Throughput | Higher | Generally lower |
| Energy efficiency | Better, steam reduces mechanical load | Higher mechanical energy demand |
Wet extrusion represents the industry standard for commercial pet food production. The preconditioner adds moisture and heat before the extruder barrel, reducing the mechanical work the screws must perform and enabling precise control over cook level and expansion. This precision allows manufacturers to produce everything from lightweight, highly expanded kibble to dense, semi-moist products using the same extruder by adjusting preconditioning parameters.
Wet extrusion also handles diverse recipes more effectively. Formulations with high levels of fresh meat, which are increasingly popular in the premium pet food segment, require the additional moisture and controlled heating that preconditioning provides. Without it, high-fat and high-meat recipes tend to slip in the barrel, cook unevenly, and produce poor-quality product.
Dry extrusion, by contrast, relies solely on mechanical friction and barrel heaters to generate cooking temperature. The absence of a preconditioner lowers both capital cost and system complexity, making dry extrusion attractive for small operations, pilot plants, or regions where steam infrastructure is unavailable. However, the reduced control over moisture and heat limits recipe flexibility and typically produces less consistent expansion.
For manufacturers planning to compete in the premium or specialty pet food segments, wet extrusion offers the versatility needed to innovate with grain-free, high-protein, and functional ingredient formulations. The higher upfront investment pays back through broader product capabilities and higher throughput.
Single-Screw vs. Twin-Screw Extruders
The screw configuration inside the extruder barrel represents another critical decision point in the pet food extrusion process. Single-screw and twin-screw designs handle materials differently, and the right choice depends on your product range, budget, and growth plans.
A single-screw extruder uses one rotating screw inside a cylindrical barrel. As the screw turns, it conveys material forward while generating heat through friction and compression. Single-screw systems are mechanically simple, cost-effective, and well-proven for standard grain-and-meal-based pet foods. They handle moderate fat levels and conventional recipes reliably.
However, single-screw extruders struggle with certain formulation challenges. High-meat recipes, recipes with significant fresh ingredient content, and formulations with irregular particle sizes can slip, cook unevenly, or cause surging in a single-screw barrel. The screw generates shear and heat along a fixed profile that cannot adapt easily to varying material properties.
Twin-screw extruders use two intermeshing screws that rotate within a figure-eight barrel cross-section. The intermeshing action actively kneads and conveys material, providing more uniform heat distribution, better mixing, and superior control over shear intensity. Twin-screw systems handle recipes with 20 to 40 percent fresh meat content, process materials with varying particle sizes more consistently, and allow operators to adjust screw configurations by changing screw elements to match specific recipes.
The team at a Brazilian pet food co-manufacturer discovered this difference firsthand. They had been running a single-screw extruder for years on conventional chicken-and-rice formulas with acceptable results. When a major client requested a grain-free, high-meat salmon recipe, the single-screw system produced kibble with uneven color, poor expansion, and a 15 percent reject rate. After upgrading to a twin-screw extruder with a segmented screw configuration optimized for high-protein formulas, the same recipe achieved consistent expansion, uniform color, and reduced reject rates below 3 percent. The switch also opened doors to additional premium co-manufacturing contracts that had previously been out of reach.
The choice between single-screw and twin-screw comes down to product strategy. If your focus is standard kibble at competitive cost, a single-screw extruder may serve your needs. If you plan to innovate with premium recipes, high-meat formulations, or specialty products, a twin-screw system provides the flexibility to execute those recipes consistently.
Interested in twin-screw extrusion for your facility? View our pet food and fish food production line to explore customizable extrusion systems designed for diverse recipes and capacities from 300 to 4,000 kilograms per hour.
Key Process Parameters and How to Control Them
Mastering the pet food extrusion process requires understanding how key parameters interact and how to adjust them for consistent output.
Temperature Control
Barrel temperature typically operates between 110 and 180 degrees Celsius across multiple heating zones. The feed zone near the inlet runs cooler to prevent premature cooking and sticking. The central cooking zones apply the highest temperatures to achieve starch gelatinization and protein denaturation. The final zone before the die may run slightly cooler to control expansion and prevent scorching.
Each recipe has an optimal temperature profile. Higher temperatures increase cook level and expansion but can degrade heat-sensitive nutrients like lysine and certain vitamins. Lower temperatures preserve nutrients but may undercook starches, reducing digestibility. Most manufacturers target a middle range that balances nutritional quality with physical product attributes.
Moisture Management
Moisture content entering the extruder barrel typically ranges from 20 to 30 percent after preconditioning. Higher moisture generally improves cook uniformity and expansion but requires longer drying times. Lower moisture reduces drying load but can produce dense, poorly expanded product.
Operators control moisture through steam injection rate, water addition in the preconditioner, and ingredient moisture content. Real-time moisture sensors before and after the extruder help operators make rapid adjustments.
Screw Speed and Specific Mechanical Energy
Screw speed, measured in revolutions per minute, affects how much mechanical energy transfers into the product. Typical pet food extrusion runs at 200 to 500 rpm. Higher screw speeds increase shear and frictional heating, which can improve cook level but also raise product temperature and risk nutrient degradation.
Specific mechanical energy combines screw speed, motor load, and throughput into a single metric representing energy input per kilogram of product. Monitoring SME helps operators maintain consistent cook levels even when raw material properties vary slightly between batches.
Die Open Area and Back-Pressure
The die plate generates back-pressure that forces material to cook under pressure before release. Die open area, the total cross-sectional area of all die holes, determines how much back-pressure develops. Smaller total open area increases pressure and cook level but reduces throughput. Larger open area allows higher throughput but may reduce cook quality.
Die hole diameter and shape determine kibble size and profile. Most manufacturers keep a library of die plates for different products. Accounting for die swell when specifying die hole size is essential for hitting target kibble dimensions.
| Parameter | Typical Range | Impact on Product |
|---|---|---|
| Preconditioner temperature | 70 to 90 degrees Celsius | Initiates starch hydration, reduces extruder wear |
| Barrel temperature | 110 to 180 degrees Celsius | Controls cook level, gelatinization, sterilization |
| Barrel pressure | 3 to 15 MPa | Affects expansion, density, texture |
| Pre-extrusion moisture | 20 to 30 percent | Determines cook uniformity and expansion |
| Screw speed | 200 to 500 rpm | Influences SME, shear, and heat generation |
| Residence time | 30 to 90 seconds | Total cook duration inside barrel |
| Final moisture after drying | 8 to 12 percent | Shelf stability and texture |
| Water activity | Below 0.60 to 0.65 | Microbial safety threshold |
Common Pet Food Extrusion Process Problems and How to Fix Them
Even well-designed pet food extrusion process lines encounter operational problems. Understanding root causes enables faster resolution and less downtime.
Surging: Uneven Flow From the Die
Surging appears as rhythmic pulses in extrudate output, producing kibble with variable density and size. The most common cause is inconsistent feeding from the mixer or feeder into the preconditioner. When feed rate fluctuates, the extruder alternates between overloaded and underloaded conditions.
To fix surging, verify feeder calibration and ensure a steady volumetric flow rate. Check for bridging in the feed hopper, where moist material clumps and blocks flow. Inspect preconditioner paddle condition, as worn paddles cannot distribute steam and water evenly.
Poor Expansion
Kibble that fails to expand properly emerges dense and hard, reducing palatability and digestibility. Poor expansion typically stems from insufficient moisture, low temperature, or excessive die open area. Each factor reduces the steam flash at the die exit that creates the porous structure.
Increase preconditioner steam and water addition to raise barrel moisture. Verify barrel heaters are reaching target temperatures. If die open area is too large for the recipe, switch to a die plate with smaller total orifice area to increase back-pressure.
Excessive Fines
High levels of broken pieces and dust increase waste and reduce packaging yield. Fines often result from brittle product, which traces back to overdrying or overcooking. Alternatively, poor grinding quality producing uneven particle sizes creates weak points in the extruded matrix.
Reduce dryer temperature or residence time if product is over-dried. Verify grinding consistency meets the 60 to 100 mesh target. Check face cutter alignment and blade sharpness, as dull or misaligned cutters crush rather than slice the extrudate.
Uneven Cooking
Kibble with inconsistent color or texture across a batch indicates uneven cooking. Causes include inadequate preconditioning, worn screw elements that fail to mix thoroughly, or barrel temperature zones that have drifted out of spec.
Optimize preconditioner moisture and temperature to ensure uniform dough entering the barrel. Inspect screw elements for wear and replace if mixing flights are eroded. Calibrate barrel heaters and verify thermocouple accuracy.
Die Blockage
Material buildup at the die plate restricts flow and forces operators to stop production for cleaning. Blockage usually occurs when recipe changes are not accompanied by appropriate die plate selection or when fat levels exceed what the die design can handle.
Match die open area to recipe specifications. For high-fat recipes, consider dies with larger initial passages or stepped designs that reduce shear concentration. Preheating the die plate before startup also helps material flow smoothly.
How Recipe Formulation Affects Extrusion
The pet food extrusion process does not operate in isolation. Raw material choices and formulation design profoundly influence how the extruder behaves and what quality of product emerges.
High-Meat Content Challenges
Premium and grain-free pet foods often contain 30 to 60 percent meat content on a dry matter basis. High meat levels introduce fat and protein that lubricate the dough, reducing friction and cook level inside the barrel. Without sufficient starch to bind the matrix, the product may fail to expand or hold its shape.
Manufacturers address this by using twin-screw extruders that generate sufficient mechanical energy despite the lubricating effect of fats. Adding functional starches or binders like pea starch, potato starch, or tapioca can improve matrix integrity in high-meat formulas. Preconditioning becomes even more critical, as the added moisture helps activate whatever starch is present.
Grain-Free Formulation Considerations
Grain-free recipes replace corn, wheat, and rice with alternatives like peas, lentils, chickpeas, and potatoes. These ingredients have different starch gelatinization temperatures and protein structures compared to traditional grains. Pea starch, for example, gelatinizes at a higher temperature than corn starch, requiring adjusted barrel temperature profiles.
Fiber content from legume hulls and vegetable inclusions also affects extrusion. Insoluble fibers disrupt the continuous dough phase, potentially reducing expansion and increasing brittleness. Formulators balance fiber levels against processing performance and nutritional targets.
Starch Source Selection
Starches provide the structural backbone of extruded kibble. Different starch sources gelatinize at different temperatures and produce varying expansion characteristics. Corn starch expands readily and produces light, crispy kibble. Rice starch gelatinizes at a lower temperature and yields a finer texture. Potato and tapioca starches create dense, chewy textures suitable for certain treat applications.
Understanding how your starch source interacts with your extruder parameters allows you to fine-tune the process rather than fighting against the material.
Fat Levels and Their Impact
Dietary fat levels above 10 to 12 percent in the pre-extrusion mix can interfere with starch gelatinization and reduce expansion. Many manufacturers keep pre-extrusion fat levels moderate and apply additional fat during the coating stage. This split approach maximizes extrusion performance while achieving target fat content in the finished product.
Quality Control During Extrusion
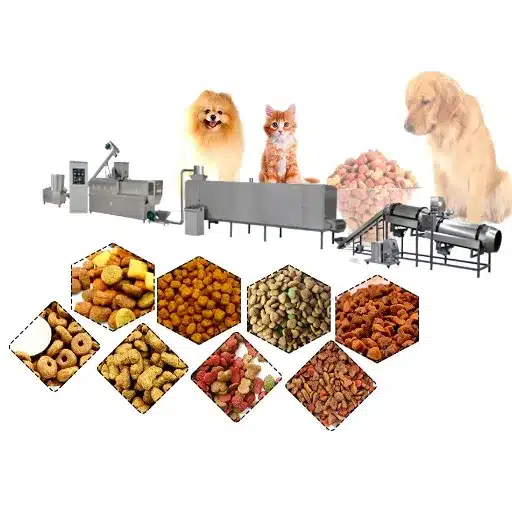
Consistent quality in the pet food extrusion process depends on monitoring and control systems that catch deviations before they become batch failures.
In-Line Moisture Monitoring
Near-infrared moisture sensors mounted at the extruder discharge and dryer exit provide real-time moisture readings. These sensors enable automatic feedback control that adjusts dryer temperature or belt speed to maintain target moisture. Facilities without in-line sensors rely on laboratory testing, which introduces a 15 to 30 minute delay between sampling and results.
Temperature Verification
Thermocouples at multiple points along the barrel should be calibrated quarterly against reference standards. A thermocouple reading even 10 degrees Celsius high or low can push product outside the optimal cook window, affecting digestibility and expansion.
Kibble Size Consistency
Operators should measure kibble dimensions at regular intervals, typically every 30 minutes during continuous production. Length, diameter, and unit weight should fall within specification limits. Trends toward larger or smaller sizes often indicate die wear, cutter issues, or moisture drift.
Microbiological Testing
While extrusion cooking destroys pathogens, post-process contamination can occur during cooling, coating, or packaging. Most facilities test finished product for Salmonella, Enterobacteriaceae, and total plate count on a scheduled basis. Some high-capacity lines install rapid microbial testing systems that deliver results in hours rather than days.
AAFCO and FEDIAF Compliance
Nutritional content must meet regional standards. In the United States, the Association of American Feed Control Officials sets nutrient profiles for complete and balanced pet foods. In Europe, the European Pet Food Industry Federation provides equivalent guidelines. Laboratory analysis of finished product verifies that extrusion cooking and post-extrusion nutrient additions deliver compliant nutritional levels.
Learn more about food-grade materials and certifications that ensure your extrusion equipment meets international safety standards.
Choosing the Right Pet Food Extrusion Equipment
Selecting extrusion equipment for the pet food extrusion process requires matching machine capabilities to your product strategy, capacity needs, and quality requirements.
Capacity Matching
Extruders come in sizes ranging from pilot-scale units processing 100 to 200 kilograms per hour up to industrial systems handling 4,000 kilograms per hour or more. Undersizing creates production bottlenecks. Oversizing reduces operating efficiency and can make it difficult to maintain stable conditions at low throughput. Most manufacturers size extruders to handle 80 to 85 percent of peak demand, leaving headroom for growth and recipe experimentation.
| Capacity Tier | kg/h | Floor Area | Typical Buyer |
|---|---|---|---|
| Pilot / Lab | 100 to 200 | 200 to 300 square meters | R&D, startup |
| Small Commercial | 300 to 500 | 400 to 600 square meters | Boutique brand |
| Medium | 500 to 1,200 | 800 to 1,200 square meters | Regional brand |
| Large | 1,500 to 3,500 | 1,500 to 2,500 square meters | National brand |
| Industrial | 4,000+ | 3,000+ square meters | Multinational |
CE Certification and International Standards
Equipment destined for European markets or export to countries recognizing European standards must carry CE certification, confirming compliance with machinery safety, electromagnetic compatibility, and hygiene directives. ISO 22000 and HACCP certifications for the manufacturing process further demonstrate food safety commitment. When evaluating suppliers, request documentation of these certifications rather than accepting verbal assurances.
Automation and Control Systems
Modern extruders feature programmable logic controllers with touchscreen human-machine interfaces. These systems store recipes, log production data, and enable remote diagnostics. Recipe storage eliminates guesswork when switching between products, while data logging supports traceability and continuous improvement. Remote diagnostics allow equipment suppliers to troubleshoot issues without waiting for an on-site visit.
Energy Efficiency Considerations
Energy represents 15 to 25 percent of operating cost in most pet food facilities. Efficient preconditioners that maximize steam use, dryers with heat recovery, and extruder motors with variable frequency drives all reduce energy consumption. Over a 10-year equipment life, energy savings from efficient design often exceed the initial purchase price difference between basic and premium systems.
Cost Considerations
Chinese-manufactured extrusion equipment typically costs 50 to 67 percent less than equivalent European systems, making advanced technology accessible to mid-sized manufacturers. The key is selecting a supplier with proven quality control, technical support capability, and experience exporting to your target markets. The lowest purchase price means little if spare parts are unavailable or technical support cannot resolve problems promptly.
Ready to explore extrusion equipment for your facility? Browse our complete pet food production line guide for detailed capacity tiers, investment ranges, and layout planning advice.
Conclusion
The pet food extrusion process transforms raw ingredients into finished kibble through a precisely controlled sequence of grinding, preconditioning, extrusion cooking, expansion, drying, coating, and packaging. Each stage offers specific parameters you can measure, monitor, and adjust to achieve consistent quality.
Key principles to remember: uniform grinding sets the foundation for stable extrusion. Preconditioning with steam and water improves throughput by 10 to 15 percent while reducing mechanical wear. Barrel temperatures between 110 and 180 degrees Celsius and pressures of 3 to 15 MPa cook the product while destroying pathogens. Wet extrusion with a twin-screw configuration handles the diverse recipes that premium pet food markets demand. Most production problems trace back to inconsistencies in the early stages, so investing time in grinding and preconditioning calibration pays dividends downstream.
When a Thai pet food startup approached us in early 2025, they had purchased used equipment without fully understanding how the extrusion parameters interacted. Their kibble varied in size, broke easily during handling, and moisture levels swung between 6 and 14 percent. After walking through the full pet food extrusion process with their team and implementing systematic parameter controls, they stabilized moisture within 0.5 percent, reduced breakage to under 2 percent, and secured a contract to supply a major retail chain. The equipment was capable. The team simply needed the process knowledge to unlock its potential.
That knowledge is now in your hands. Whether you are troubleshooting an existing line or planning a new facility, applying the principles in this guide will help you produce extruded pet food that meets the quality standards your customers and their pets expect.
Contact our engineering team today to discuss your extrusion requirements, request a customized proposal, or schedule a technical consultation. With over 10 years of experience in food processing machinery and CE-certified equipment serving clients in more than 50 countries, we deliver extrusion systems tailored to your unique production goals.